How to Add Font to PicsArt – Custom Fonts on Mobile and Desktop App
Fonts play a major role in making your photos and designs stand out. They can completely change the mood of your image, add personality to your text, and make your edits more professional.
PicsArt, one of the most popular photo editing apps, already comes with a large library of fonts — but sometimes, you want something unique that reflects your personal style. The good news is that you can easily add custom fonts to PicsArt, both on your mobile device and desktop version.
In this guide, you’ll learn step-by-step how to install and use your favorite fonts in PicsArt APK, so your edits always look fresh and creative.
Why Add Custom Fonts to PicsArt?
While PicsArt provides many built-in fonts, creative users often want to use specific styles that match their design needs. Custom fonts help you:
- Create unique branding or consistent themes for social media posts.
- Use stylish typography for posters, invitations, or banners.
- Match specific moods — like elegant scripts for wedding designs or bold fonts for modern advertisements.
- Stand out from others using the same standard fonts available in the app.
- Adding custom fonts is also great for influencers, designers, and business owners who want their edits to look professional and personalized.
How to Add Fonts to PicsArt on Mobile (Android and iOS)
Adding custom fonts on mobile devices is simple once you know where to look. You can use free font websites or apps to download new fonts and then import them directly into PicsArt.
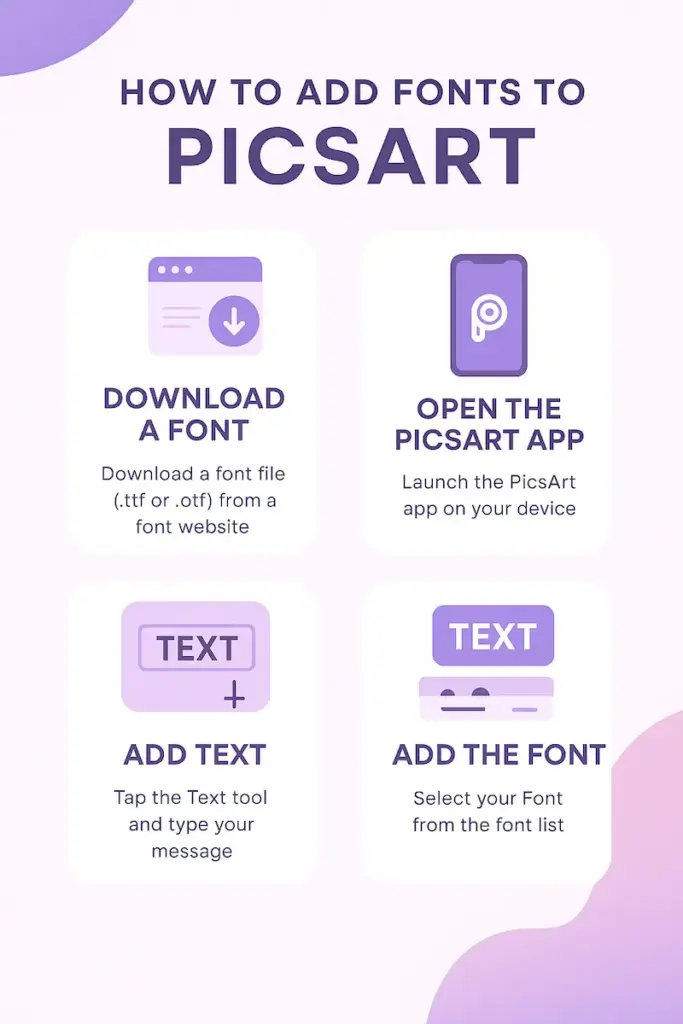
Step 1: Download Your Desired Font
You can download fonts from websites like DaFont, Google Fonts, or FontSpace. Most fonts come in a .ttf or .otf file format, which PicsArt supports.
- Open your browser and visit a font website.
- Choose a font style you like.
- Tap Download and save it to your phone’s file manager.
- If the file comes in a ZIP folder, use your phone’s file manager or an app like “RAR” to extract it.
Step 2: Open PicsArt and Add Text
- Launch the PicsArt app.
- Tap on the “+” button and select the photo or project you want to edit.
- Choose the “Text” tool and type your text.
- At this point, you’ll see the default font options that come with PicsArt.
Step 3: Add Your Custom Font
- Scroll through the font options until you find “My Fonts” or “Upload Font.”
- Tap it, and PicsArt will open your file browser.
- Locate the .ttf or .otf font file you downloaded earlier.
- Tap on it to import it into PicsArt.
Once uploaded, the new font will appear in your My Fonts section. You can now use it for any text you add in the future.
Step 4: Adjust Font Style and Effects
After applying your new font, you can customize it further by changing:
- Font size and color
- Shadow and outline effects
- Text spacing and alignment
- Gradient or texture fill
PicsArt gives you full control over how your text looks, so you can match it perfectly with your image’s style and mood.
How to Add Fonts to PicsArt on PC (Desktop Version)
If you prefer editing on a bigger screen, PicsArt’s desktop version also allows you to use custom fonts easily. The process is slightly different, but the concept is the same.
- Download and install the Font on your computer.
- Launch PicsArt for Windows or go to PicsArt Web Editor.
- Upload your image or start a new design project.
- Click on the Text tool and type your message.
- When you open the font list, you’ll see a section labeled “System Fonts.”
- Your newly installed font will appear here automatically. Simply click on it to apply it to your text.
- After adding your custom font, you can enhance it using the available text tools:
- Apply outlines or shadows for better visibility.
- Adjust transparency for subtle effects.
- Align and resize your text as needed.
- Once done, click Save or Export to download your edited image.
Tips for Choosing the Right Fonts
Adding custom fonts is easy, but picking the right one is what makes your design shine. Here are a few tips to help you choose wisely:
- Match the Mood: Use elegant script fonts for romantic edits, bold fonts for motivational posters, and fun handwritten fonts for casual content.
- Keep It Readable: Avoid overly complex fonts that are hard to read, especially for longer text.
- Combine Fonts Wisely: Pair a decorative font with a simple one to create contrast and balance.
- Stay Consistent: If you’re designing a series of posts or a brand style, use the same font family for visual harmony.
- Test on Different Backgrounds: Make sure your text is visible on both light and dark images.
Best Sources to Download Free Fonts
Here are a few trusted sites where you can safely download free fonts for PicsArt:
- DaFont.com – Offers thousands of free fonts in every style imaginable.
- Google Fonts – Perfect for clean, professional fonts that work across devices.
- FontSpace – User-friendly and includes both free and commercial-use options.
- 1001 Fonts – Great for themed or decorative fonts for creative edits.
Always make sure the font is free for personal use, or check the license if you plan to use it commercially.
Final Thoughts
Adding custom fonts to PicsArt gives you more creative control over your designs. It lets you move beyond the standard options and truly personalize your edits. Whether you’re creating quotes, promotional designs, or aesthetic posts, using your favorite font makes your work stand out.
On mobile, simply download the font and upload it to PicsArt’s “My Fonts” section. On desktop, install the font on your computer and access it through the “System Fonts” list in PicsArt.
With just a few steps, you can give your text a fresh and stylish look that matches your creative vision. So, explore different font styles, experiment with colors and effects, and make your next PicsArt project more unique and expressive than ever before.

![How to Extend Background in PicsArt MOD APK [Step-by-Step]](https://picartmod.com/wp-content/uploads/2025/10/how-to-extend-background-in-picsart-768x432.webp)